How To Add PVL and Per Diem From Your Web Browser
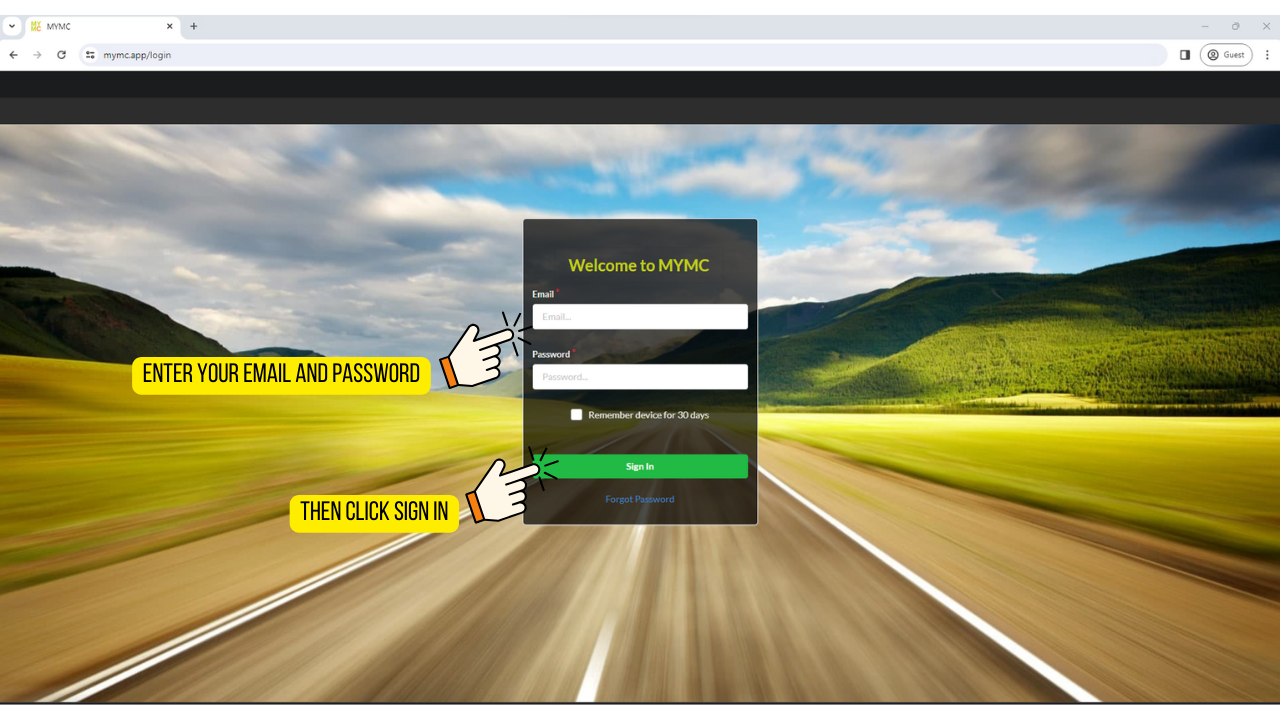
Step 1. Sign into your MYMC Account
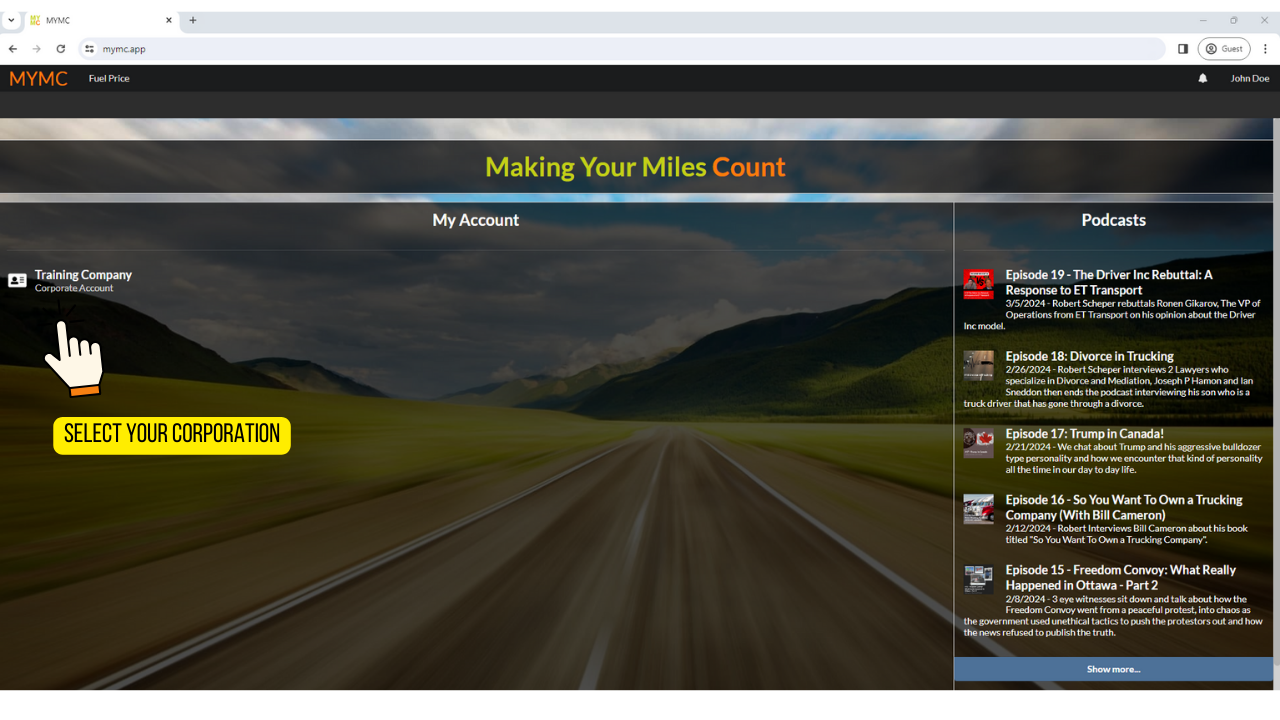
Step 2. Select your Corporation
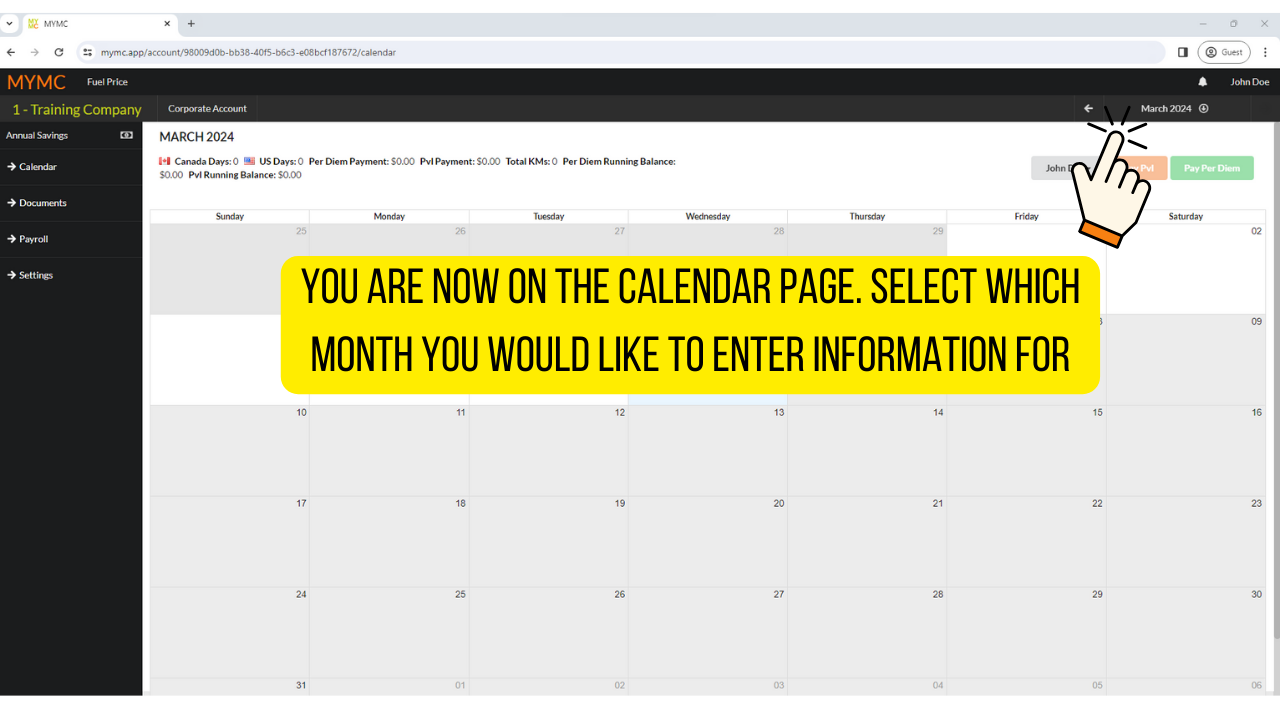
Step 3. You are now on the Calendar page. Select with month you would like to enter information for.
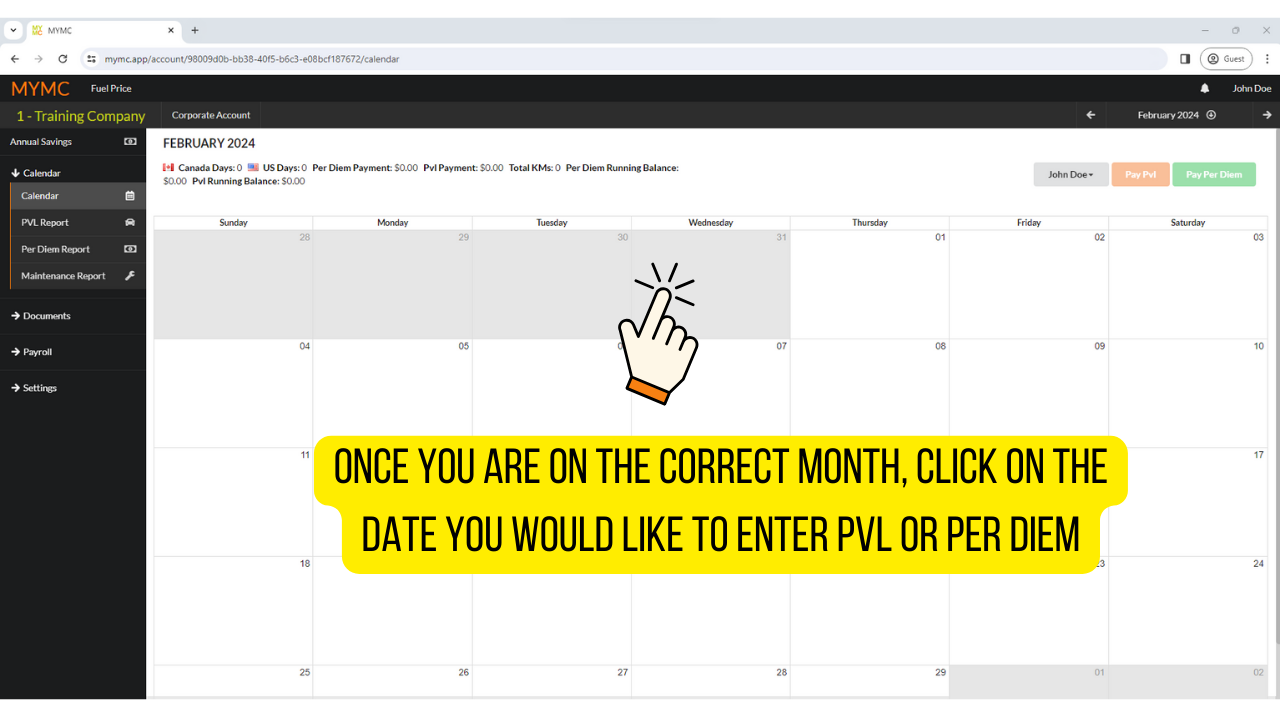
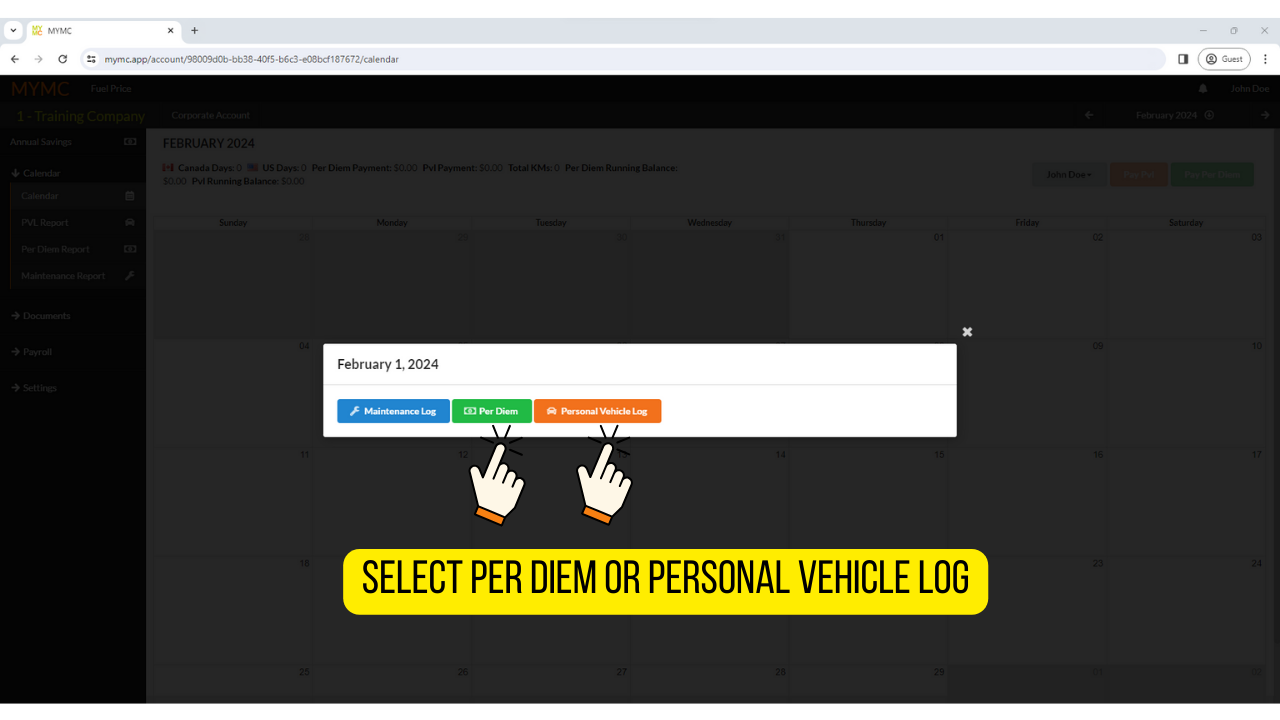
Step 4. Once you are on the correct month, click on the date you would like to enter PVL
Adding Personal Vehicle Log.
Step 1. Select Personal Vehicle Log
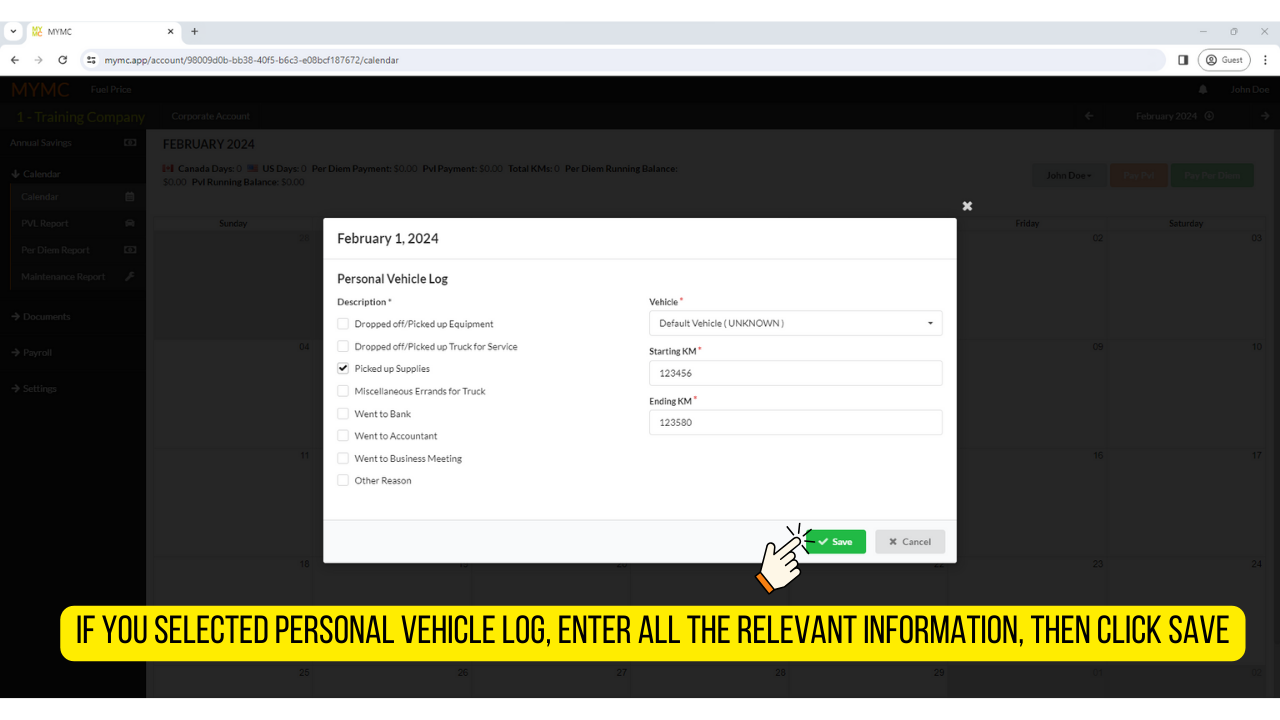
Step 2. If you selected Personal Vehicle Log, enter all the relevant information then click save
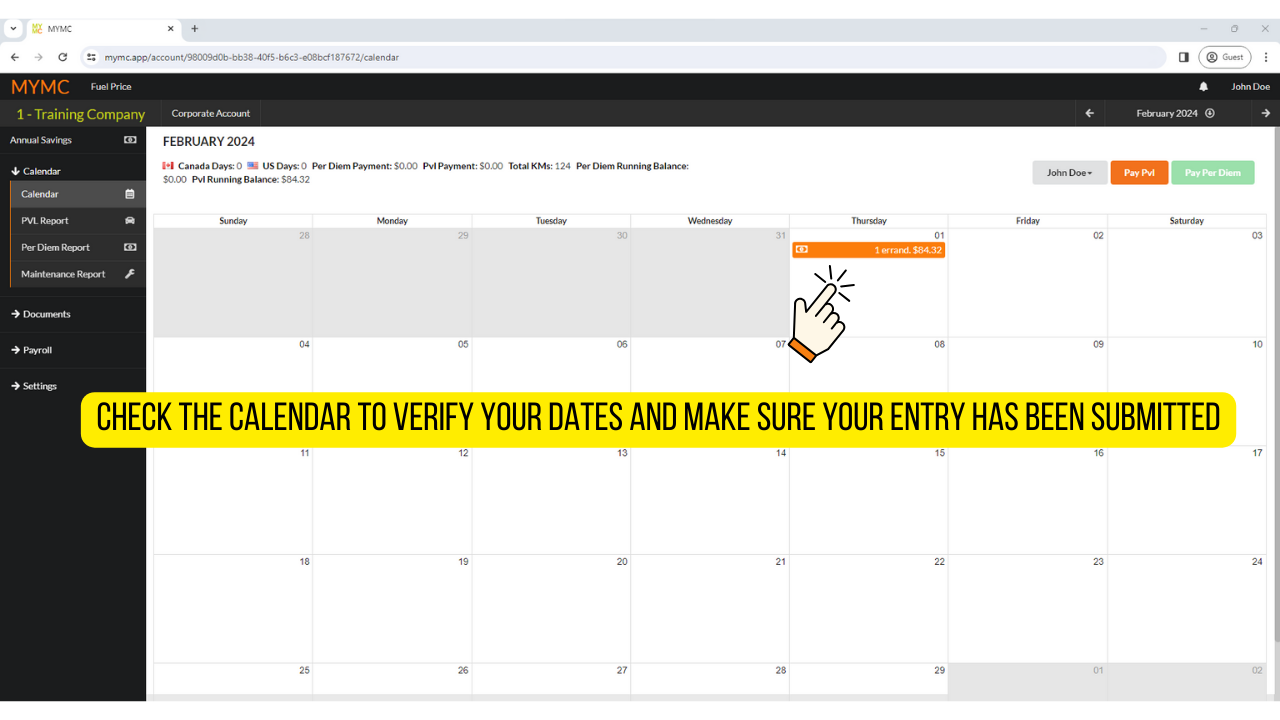
Step 3. Check the calendar to verify your dates and make sure your entry has been submitted.
Adding Per Diem.
Step 1. Select Per Diem.

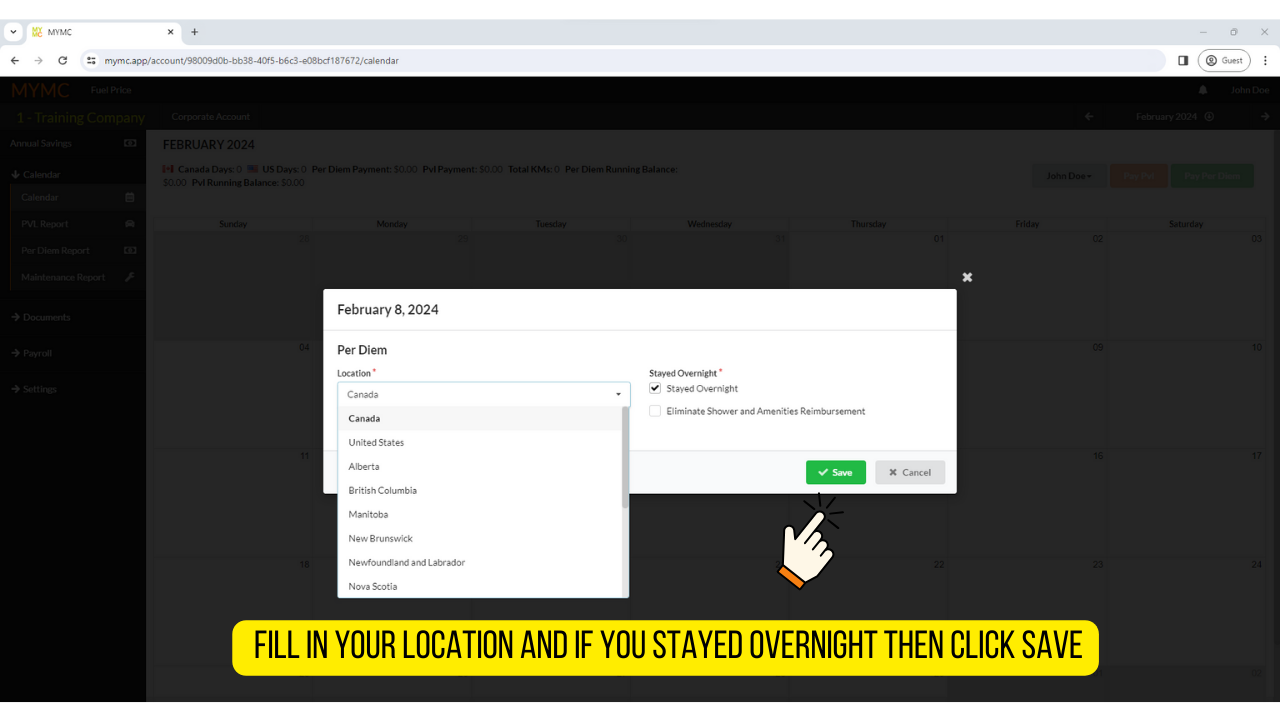
Step 2. Fill in your location and if you stayed overnight then click save.
Step 3. Check the calendar to verify your dates and make sure your entry has been submitted.

You have now entered PVL and Per Diem.
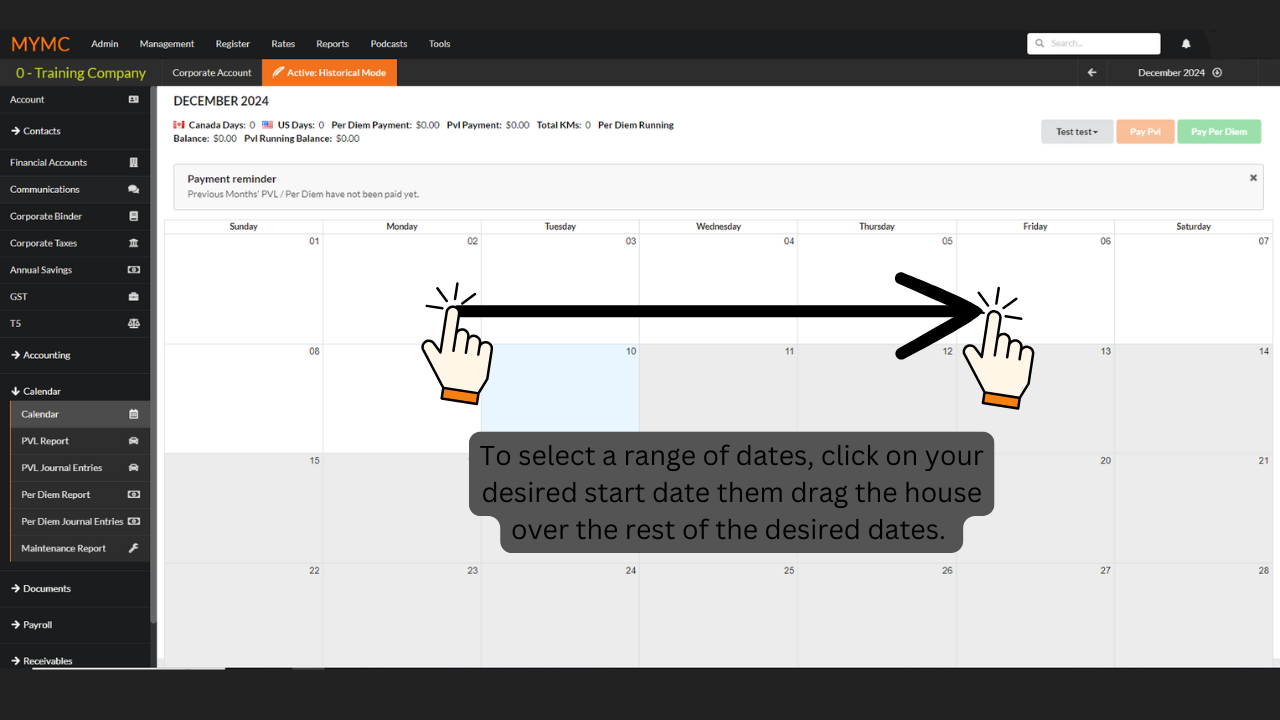
Adding Per Diem for a range of dates
Step 1: to select a range of dates, click on your desired start date then drag the mouse over the rest of the desired dates.
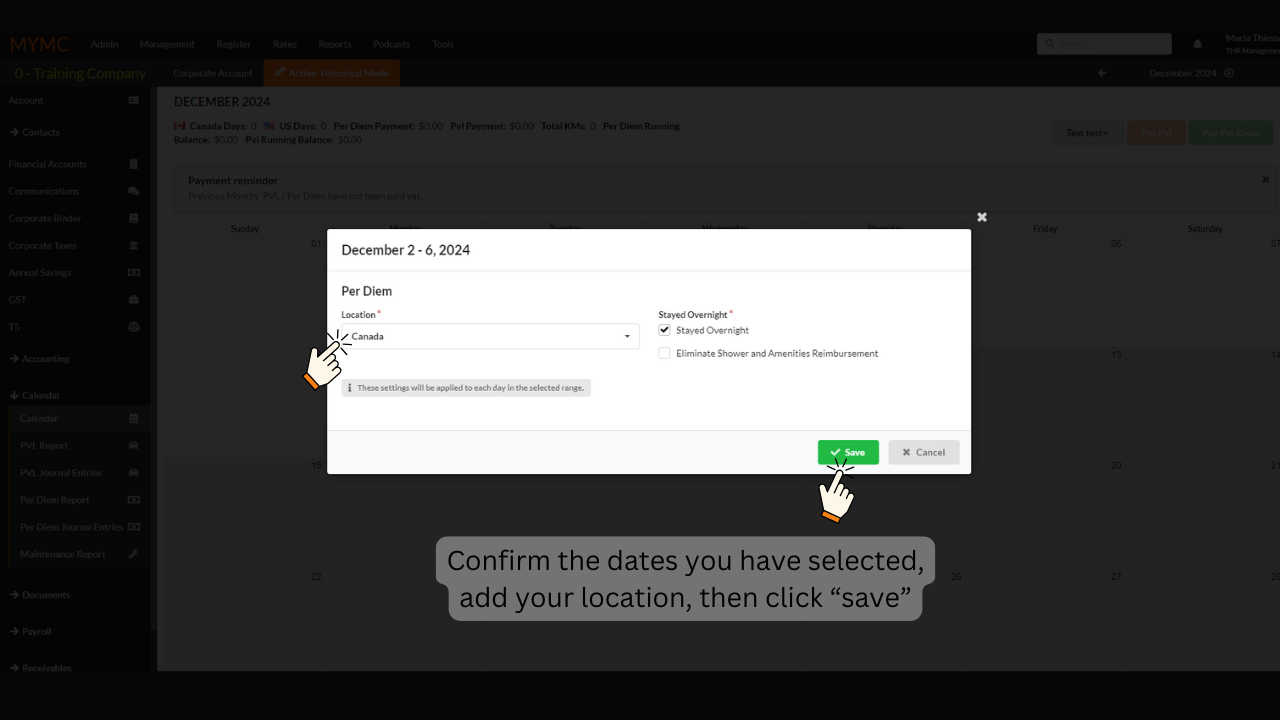
Step 2: Click “Per Diem”

Step 3: Confirm your range of dates, add a location then click “Save”
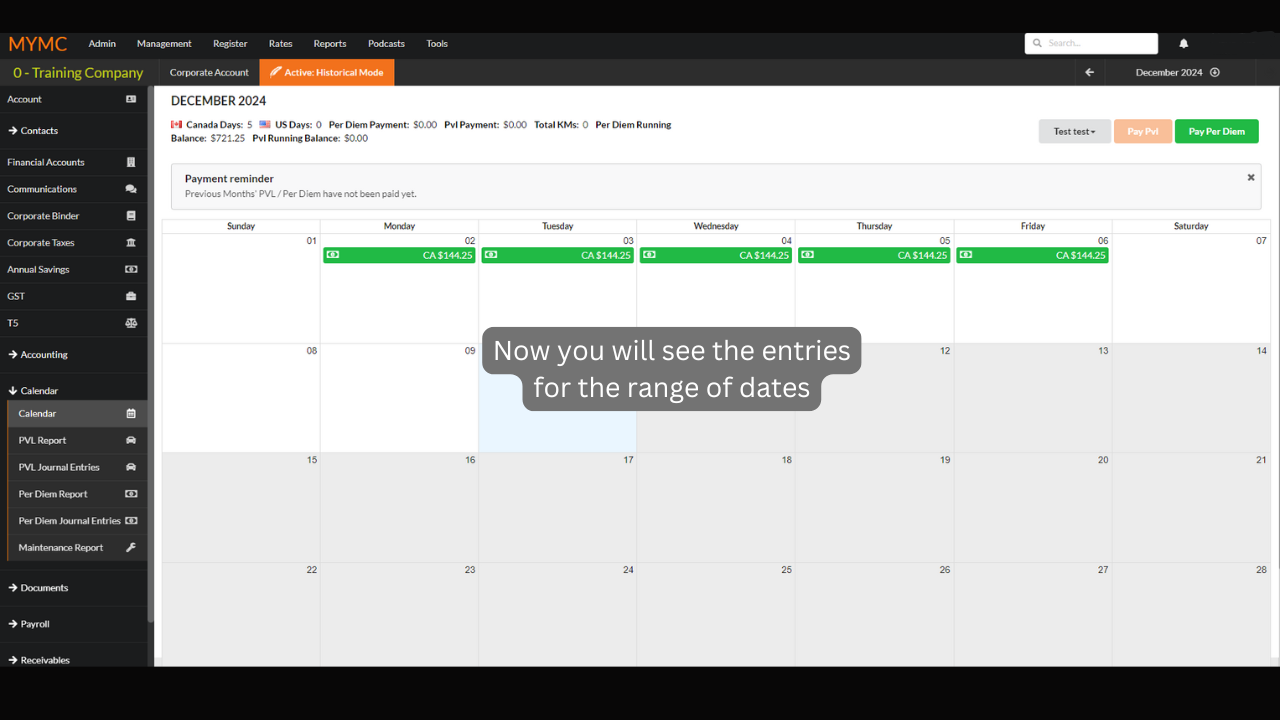
Step 4: Now you can see the range of dates – your per diem is added!
Great job!